-
keyboard_arrow_right keyboard_arrow_down
-
keyboard_arrow_right keyboard_arrow_down
-
keyboard_arrow_right keyboard_arrow_down
-
-
-
keyboard_arrow_right keyboard_arrow_down
-
keyboard_arrow_right keyboard_arrow_down
-
keyboard_arrow_right keyboard_arrow_down
-
keyboard_arrow_right keyboard_arrow_down
-
keyboard_arrow_right keyboard_arrow_down
-
keyboard_arrow_right keyboard_arrow_down
-
keyboard_arrow_right keyboard_arrow_down
-
keyboard_arrow_right keyboard_arrow_down
-
keyboard_arrow_right keyboard_arrow_down
-
keyboard_arrow_right keyboard_arrow_down
-
keyboard_arrow_right keyboard_arrow_down
-
keyboard_arrow_right keyboard_arrow_down
-
keyboard_arrow_right keyboard_arrow_down
-
keyboard_arrow_right keyboard_arrow_down
-
keyboard_arrow_right keyboard_arrow_down
-
keyboard_arrow_right keyboard_arrow_down
-
keyboard_arrow_right keyboard_arrow_down
-
keyboard_arrow_right keyboard_arrow_down
-
-
keyboard_arrow_right keyboard_arrow_down
-
keyboard_arrow_right keyboard_arrow_down
-
keyboard_arrow_right keyboard_arrow_down
-
keyboard_arrow_right keyboard_arrow_down
-
keyboard_arrow_right keyboard_arrow_down
-
keyboard_arrow_right keyboard_arrow_down
-
keyboard_arrow_right keyboard_arrow_down
-
keyboard_arrow_right keyboard_arrow_down
-
keyboard_arrow_right keyboard_arrow_down
-
-
-
keyboard_arrow_right keyboard_arrow_down
-
keyboard_arrow_right keyboard_arrow_down
-
keyboard_arrow_right keyboard_arrow_down
-
keyboard_arrow_right keyboard_arrow_down
-
-
-
keyboard_arrow_right keyboard_arrow_down
-
keyboard_arrow_right keyboard_arrow_down
-
keyboard_arrow_right keyboard_arrow_down
-
-
keyboard_arrow_right keyboard_arrow_down
-
keyboard_arrow_right keyboard_arrow_down
-
keyboard_arrow_right keyboard_arrow_down
-
keyboard_arrow_right keyboard_arrow_down
-
keyboard_arrow_right keyboard_arrow_down
-
-
keyboard_arrow_right keyboard_arrow_down
-
keyboard_arrow_right keyboard_arrow_down
-
keyboard_arrow_right keyboard_arrow_down
-
keyboard_arrow_right keyboard_arrow_down
-
keyboard_arrow_right keyboard_arrow_down
-
keyboard_arrow_right keyboard_arrow_down
-
keyboard_arrow_right keyboard_arrow_down
-
keyboard_arrow_right keyboard_arrow_down
-
keyboard_arrow_right keyboard_arrow_down
-
keyboard_arrow_right keyboard_arrow_down
-
keyboard_arrow_right keyboard_arrow_down
-
keyboard_arrow_right keyboard_arrow_down
-
keyboard_arrow_right keyboard_arrow_down
-
keyboard_arrow_right keyboard_arrow_down
-
-
-
keyboard_arrow_right keyboard_arrow_down
-
keyboard_arrow_right keyboard_arrow_down
-
keyboard_arrow_right keyboard_arrow_down
-
keyboard_arrow_right keyboard_arrow_down
-
keyboard_arrow_right keyboard_arrow_down
-
keyboard_arrow_right keyboard_arrow_down
-
keyboard_arrow_right keyboard_arrow_down
-
keyboard_arrow_right keyboard_arrow_down
-
-
keyboard_arrow_right keyboard_arrow_down
-
keyboard_arrow_right keyboard_arrow_down
-
keyboard_arrow_right keyboard_arrow_down
-
-
keyboard_arrow_right keyboard_arrow_down
-
keyboard_arrow_right keyboard_arrow_down
-
keyboard_arrow_right keyboard_arrow_down
-
keyboard_arrow_right keyboard_arrow_down
-
-
keyboard_arrow_right keyboard_arrow_down
-
keyboard_arrow_right keyboard_arrow_down
-
keyboard_arrow_right keyboard_arrow_down
-
keyboard_arrow_right keyboard_arrow_down
-
keyboard_arrow_right keyboard_arrow_down
-
keyboard_arrow_right keyboard_arrow_down
-
keyboard_arrow_right keyboard_arrow_down
-
keyboard_arrow_right keyboard_arrow_down
-
keyboard_arrow_right keyboard_arrow_down
-
keyboard_arrow_right keyboard_arrow_down
-
keyboard_arrow_right keyboard_arrow_down
-
keyboard_arrow_right keyboard_arrow_down
-
keyboard_arrow_right keyboard_arrow_down
-
keyboard_arrow_right keyboard_arrow_down
-
-
keyboard_arrow_right keyboard_arrow_down
-
keyboard_arrow_right keyboard_arrow_down
-
keyboard_arrow_right keyboard_arrow_down
-
keyboard_arrow_right keyboard_arrow_down
-
keyboard_arrow_right keyboard_arrow_down
-
keyboard_arrow_right keyboard_arrow_down
-
keyboard_arrow_right keyboard_arrow_down
-
keyboard_arrow_right keyboard_arrow_down
-
keyboard_arrow_right keyboard_arrow_down
-
keyboard_arrow_right keyboard_arrow_down
-
keyboard_arrow_right keyboard_arrow_down
-
keyboard_arrow_right keyboard_arrow_down
-
keyboard_arrow_right keyboard_arrow_down
-
keyboard_arrow_right keyboard_arrow_down
-
keyboard_arrow_right keyboard_arrow_down
-
-
keyboard_arrow_right keyboard_arrow_down
-
keyboard_arrow_right keyboard_arrow_down
-
keyboard_arrow_right keyboard_arrow_down
-
keyboard_arrow_right keyboard_arrow_down
-
keyboard_arrow_right keyboard_arrow_down
-
keyboard_arrow_right keyboard_arrow_down
-
keyboard_arrow_right keyboard_arrow_down
-
keyboard_arrow_right keyboard_arrow_down
-
keyboard_arrow_right keyboard_arrow_down
-
keyboard_arrow_right keyboard_arrow_down
-
-
-
keyboard_arrow_right keyboard_arrow_down
-
keyboard_arrow_right keyboard_arrow_down
-
keyboard_arrow_right keyboard_arrow_down
-
keyboard_arrow_right keyboard_arrow_down
-
-
keyboard_arrow_right keyboard_arrow_down
-
-
keyboard_arrow_right keyboard_arrow_down
- Xunison
- Explore Our Products
- Platforms
- iOS Application
- Smart Home
- Create, Edit, and Delete Automations
Create, Edit, and Delete Automations
As the name suggests, home automation means the customer can control the utilities and other features of their home via the Internet to make their lives more convenient, and even spend less on household bills.
Home automation smart home devices can be controlled through a smartphone application. Not only homeowners can control their electrical appliances, but they can also manage their home security system too.
Create Automation:
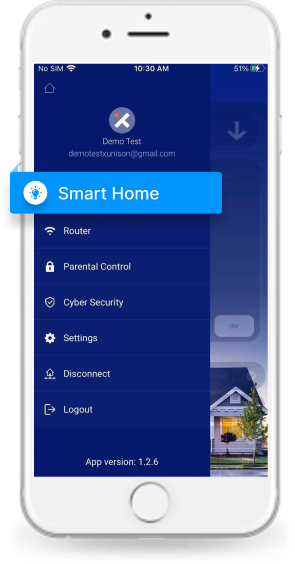
Step 1: Smart Home
Select "Smart Home" from the left menu.
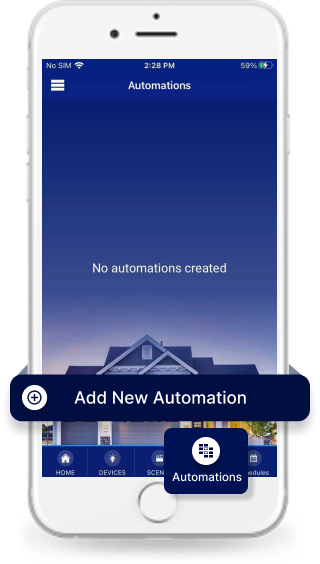
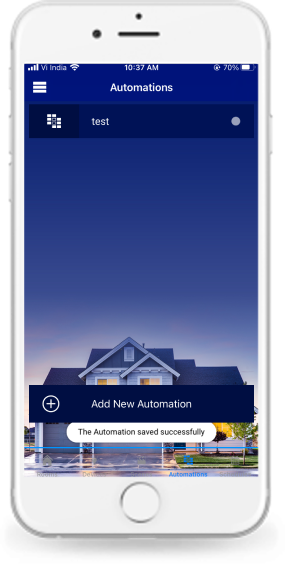
Step 2: Create New Automation
Go to the “Automation” section as shown below.
Select “Add New Automation”.
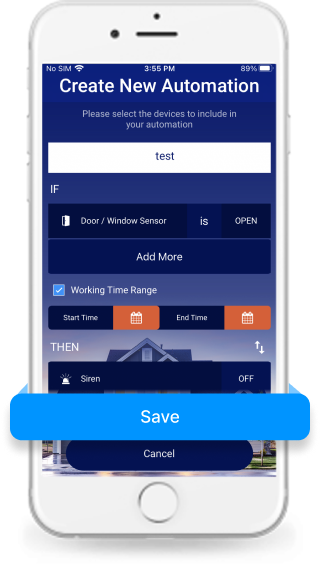
Step 3: Enter Details
Enter a name for the automation.

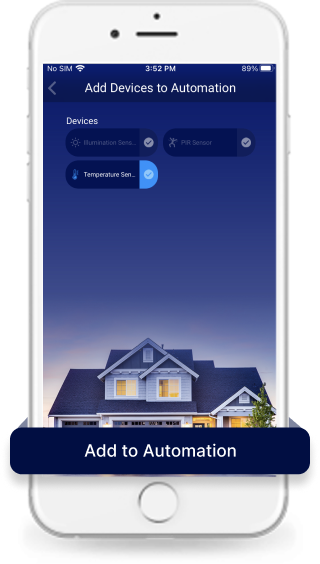
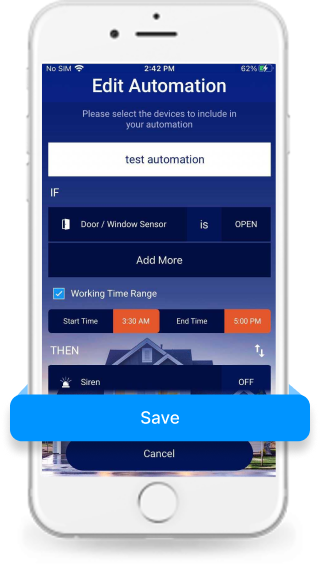
Step 4: Add Devices For IF Condition
Add device in IF condition under the add more actions.
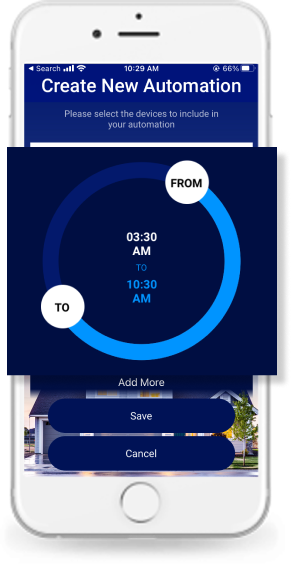
Step 3: Time Duration
Set the Start time and end time to perform the automation.
Note: Set time is optional.
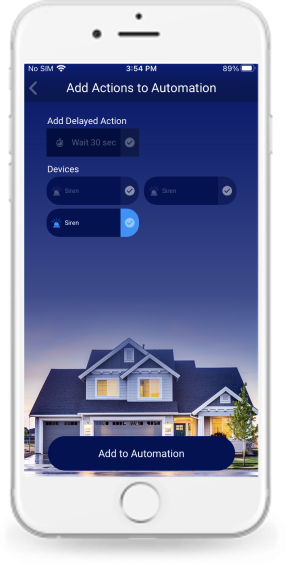
Step 4: Add Devices In Than Condition
Add device In Than Condition under the add more actions.
Step 5: Save Automation
Set the device's status and click on "Save".
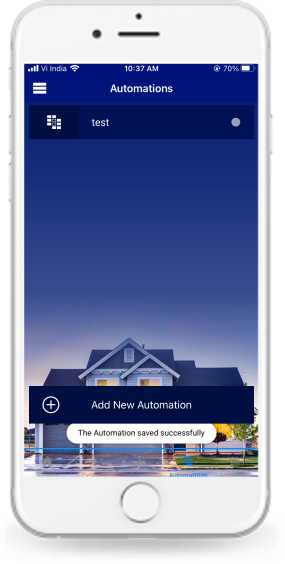
Step 6: Automation Created
You can see that the automation is created successfully.
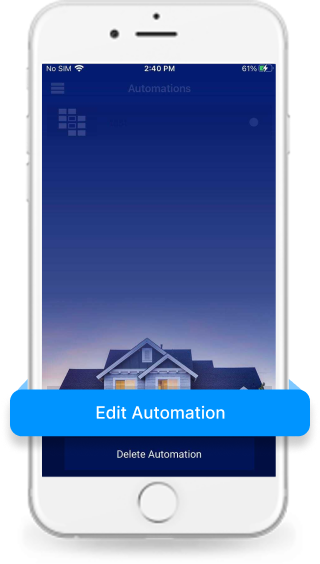
Edit Automation:
Step 1: Edit Automation
Long Press on the automation: here it is “Test Automation”.
Select “Edit Automation”.
Step 2: Save Automation
You can edit the automation name, and working time from here.
Select Save after making the changes.
Step 3: Automation Edited Successfully
The automation is edited successfully and the message will flash on the screen as shown below: “The Automation saved successfully”.
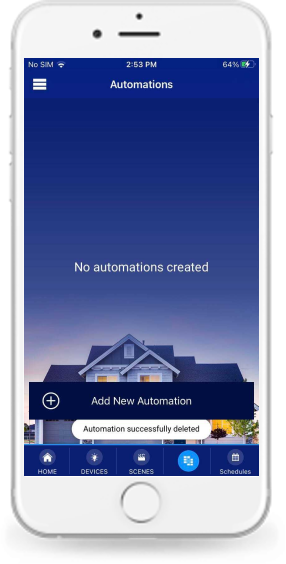
Delete Automation:
Step 1: Delete Automation
To delete, long press on the automation and select “Delete Automation”.
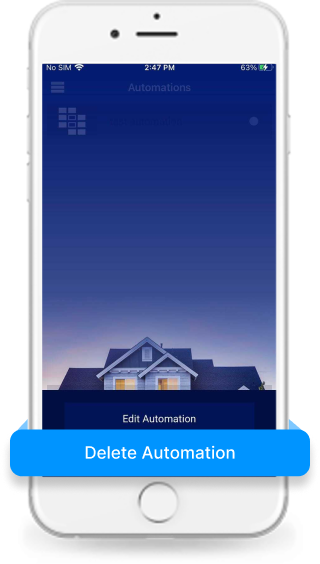
Step 2: Confirm The Deletion
Select “Confirm” to delete the automation.
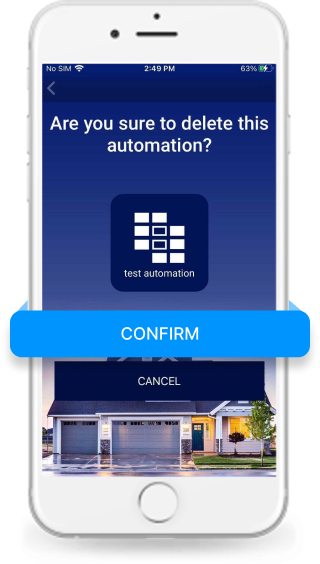
Automation was deleted successfully.