-
keyboard_arrow_right keyboard_arrow_down
-
keyboard_arrow_right keyboard_arrow_down
-
keyboard_arrow_right keyboard_arrow_down
-
-
-
keyboard_arrow_right keyboard_arrow_down
-
keyboard_arrow_right keyboard_arrow_down
-
keyboard_arrow_right keyboard_arrow_down
-
keyboard_arrow_right keyboard_arrow_down
-
keyboard_arrow_right keyboard_arrow_down
-
keyboard_arrow_right keyboard_arrow_down
-
keyboard_arrow_right keyboard_arrow_down
-
keyboard_arrow_right keyboard_arrow_down
-
keyboard_arrow_right keyboard_arrow_down
-
keyboard_arrow_right keyboard_arrow_down
-
keyboard_arrow_right keyboard_arrow_down
-
keyboard_arrow_right keyboard_arrow_down
-
keyboard_arrow_right keyboard_arrow_down
-
keyboard_arrow_right keyboard_arrow_down
-
keyboard_arrow_right keyboard_arrow_down
-
keyboard_arrow_right keyboard_arrow_down
-
keyboard_arrow_right keyboard_arrow_down
-
keyboard_arrow_right keyboard_arrow_down
-
-
keyboard_arrow_right keyboard_arrow_down
-
keyboard_arrow_right keyboard_arrow_down
-
keyboard_arrow_right keyboard_arrow_down
-
keyboard_arrow_right keyboard_arrow_down
-
keyboard_arrow_right keyboard_arrow_down
-
keyboard_arrow_right keyboard_arrow_down
-
keyboard_arrow_right keyboard_arrow_down
-
keyboard_arrow_right keyboard_arrow_down
-
keyboard_arrow_right keyboard_arrow_down
-
-
-
keyboard_arrow_right keyboard_arrow_down
-
keyboard_arrow_right keyboard_arrow_down
-
keyboard_arrow_right keyboard_arrow_down
-
keyboard_arrow_right keyboard_arrow_down
-
-
-
keyboard_arrow_right keyboard_arrow_down
-
keyboard_arrow_right keyboard_arrow_down
-
keyboard_arrow_right keyboard_arrow_down
-
-
keyboard_arrow_right keyboard_arrow_down
-
keyboard_arrow_right keyboard_arrow_down
-
keyboard_arrow_right keyboard_arrow_down
-
keyboard_arrow_right keyboard_arrow_down
-
keyboard_arrow_right keyboard_arrow_down
-
-
keyboard_arrow_right keyboard_arrow_down
-
keyboard_arrow_right keyboard_arrow_down
-
keyboard_arrow_right keyboard_arrow_down
-
keyboard_arrow_right keyboard_arrow_down
-
keyboard_arrow_right keyboard_arrow_down
-
keyboard_arrow_right keyboard_arrow_down
-
keyboard_arrow_right keyboard_arrow_down
-
keyboard_arrow_right keyboard_arrow_down
-
keyboard_arrow_right keyboard_arrow_down
-
keyboard_arrow_right keyboard_arrow_down
-
keyboard_arrow_right keyboard_arrow_down
-
keyboard_arrow_right keyboard_arrow_down
-
keyboard_arrow_right keyboard_arrow_down
-
keyboard_arrow_right keyboard_arrow_down
-
-
-
keyboard_arrow_right keyboard_arrow_down
-
keyboard_arrow_right keyboard_arrow_down
-
keyboard_arrow_right keyboard_arrow_down
-
keyboard_arrow_right keyboard_arrow_down
-
keyboard_arrow_right keyboard_arrow_down
-
keyboard_arrow_right keyboard_arrow_down
-
keyboard_arrow_right keyboard_arrow_down
-
keyboard_arrow_right keyboard_arrow_down
-
-
keyboard_arrow_right keyboard_arrow_down
-
keyboard_arrow_right keyboard_arrow_down
-
keyboard_arrow_right keyboard_arrow_down
-
-
keyboard_arrow_right keyboard_arrow_down
-
keyboard_arrow_right keyboard_arrow_down
-
keyboard_arrow_right keyboard_arrow_down
-
-
keyboard_arrow_right keyboard_arrow_down
-
keyboard_arrow_right keyboard_arrow_down
-
keyboard_arrow_right keyboard_arrow_down
-
keyboard_arrow_right keyboard_arrow_down
-
keyboard_arrow_right keyboard_arrow_down
-
keyboard_arrow_right keyboard_arrow_down
-
keyboard_arrow_right keyboard_arrow_down
-
keyboard_arrow_right keyboard_arrow_down
-
keyboard_arrow_right keyboard_arrow_down
-
keyboard_arrow_right keyboard_arrow_down
-
keyboard_arrow_right keyboard_arrow_down
-
keyboard_arrow_right keyboard_arrow_down
-
keyboard_arrow_right keyboard_arrow_down
-
keyboard_arrow_right keyboard_arrow_down
-
-
keyboard_arrow_right keyboard_arrow_down
-
keyboard_arrow_right keyboard_arrow_down
-
keyboard_arrow_right keyboard_arrow_down
-
keyboard_arrow_right keyboard_arrow_down
-
keyboard_arrow_right keyboard_arrow_down
-
keyboard_arrow_right keyboard_arrow_down
-
keyboard_arrow_right keyboard_arrow_down
-
keyboard_arrow_right keyboard_arrow_down
-
keyboard_arrow_right keyboard_arrow_down
-
keyboard_arrow_right keyboard_arrow_down
-
keyboard_arrow_right keyboard_arrow_down
-
keyboard_arrow_right keyboard_arrow_down
-
keyboard_arrow_right keyboard_arrow_down
-
keyboard_arrow_right keyboard_arrow_down
-
keyboard_arrow_right keyboard_arrow_down
-
-
keyboard_arrow_right keyboard_arrow_down
-
keyboard_arrow_right keyboard_arrow_down
-
keyboard_arrow_right keyboard_arrow_down
-
keyboard_arrow_right keyboard_arrow_down
-
keyboard_arrow_right keyboard_arrow_down
-
keyboard_arrow_right keyboard_arrow_down
-
keyboard_arrow_right keyboard_arrow_down
-
keyboard_arrow_right keyboard_arrow_down
-
keyboard_arrow_right keyboard_arrow_down
-
keyboard_arrow_right keyboard_arrow_down
-
-
-
keyboard_arrow_right keyboard_arrow_down
-
keyboard_arrow_right keyboard_arrow_down
-
keyboard_arrow_right keyboard_arrow_down
-
keyboard_arrow_right keyboard_arrow_down
-
-
keyboard_arrow_right keyboard_arrow_down
-
-
keyboard_arrow_right keyboard_arrow_down
- Xunison
- Explore Our Products
- Platforms
- Android application
- Smart Home
- Automation?
- How To Create An Automation?
How To Create An Automation?
The Xunison X-home application empowers users to create automation for their smart homes, simplifying daily routines and enhancing convenience. By defining triggers, conditions, and actions, individuals can automate various tasks and behaviors of their connected devices.
This feature enables seamless integration and control, transforming houses into intelligent and responsive living spaces.
Discover how to create automation in your smart home with these steps, enabling you to streamline tasks and enhance convenience.
Note:
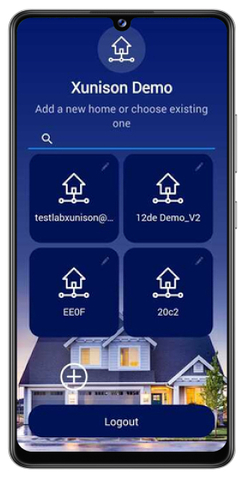
Log in to your Xunison Application and you will be directed to the home gateway.
Select the home gateway and proceed ahead.
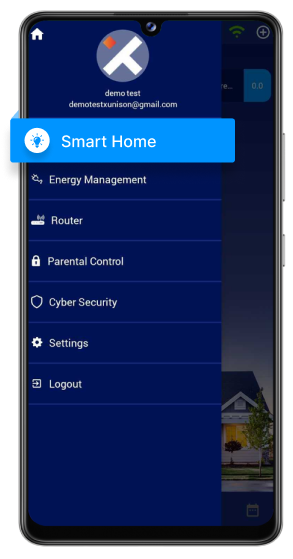
Step 1: Click on the Smart Home
Click on the Smart Home from the left navigation bar.
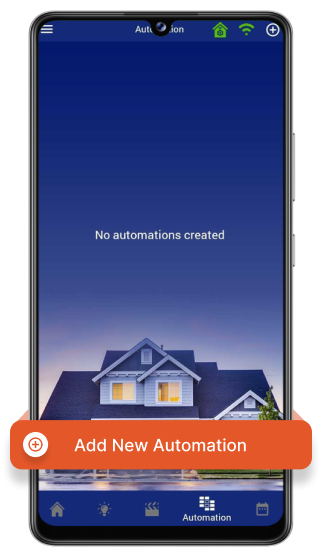
Step 2: New Automation
Select the 4th option Automation from the bottom of your screen.
Select "Add New Automation".
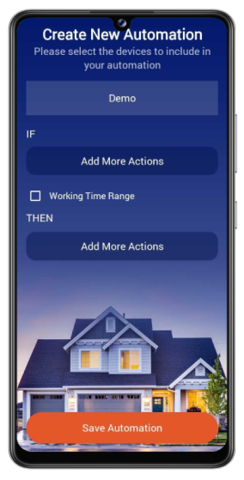
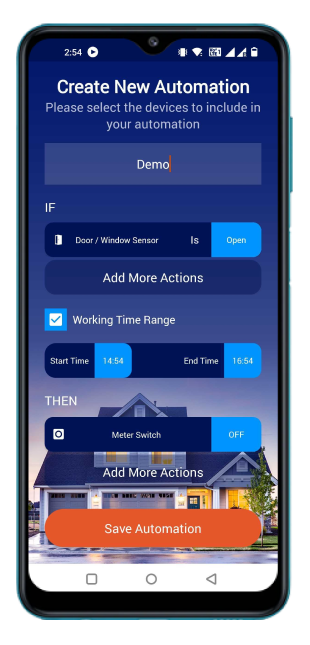
Step 3: Enter The Details
Enter the automation name, add more actions and working time to create a new automation.
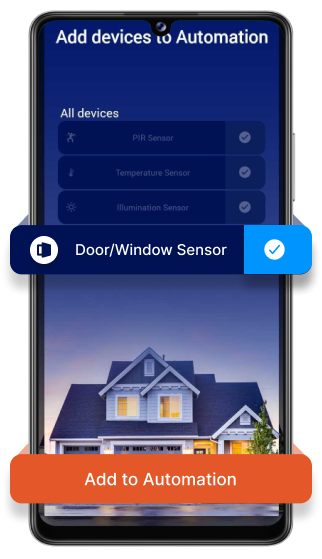
Step 4: Add Devices For IF Condition
Add device in IF condition under the add more actions.
(Note: If - You can select the smart-home device who triggered by sense, this type of device are perform in IF section.i.e. - Door/Windows sensor , PIR Sensor, Water Leakage sensor, Smart Temperature & Humidity Detector , Smoke sensor, Smart Motion sensor etc.)
Step 5: Select Working Time
Click on the Checkbox.
Step 6: Set The Start And End Time
After selecting the working time, we can set the start and the end time.
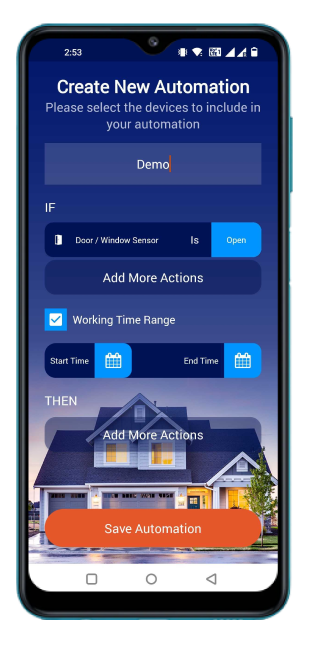
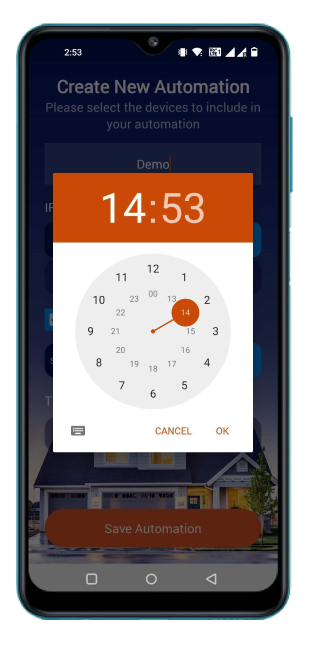
Step 7: Time Duration - Set The Start Time
Tap on Start Time. Set the Start time to perform the automation.
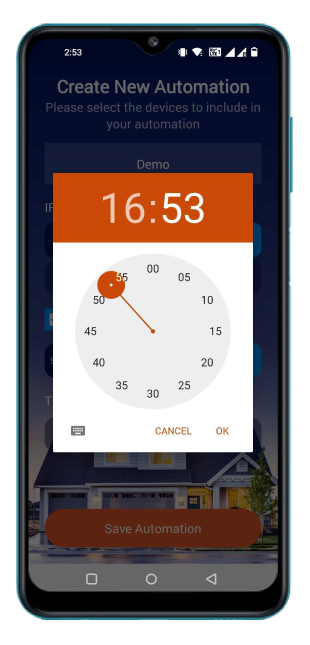
Step 8: Time Duration - Set The End Time
Tap on End Time. Set the End time to perform the automation.
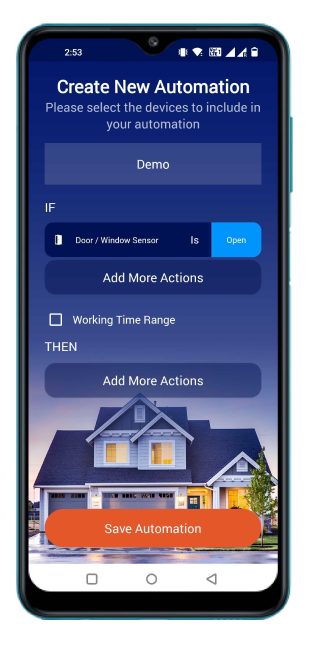
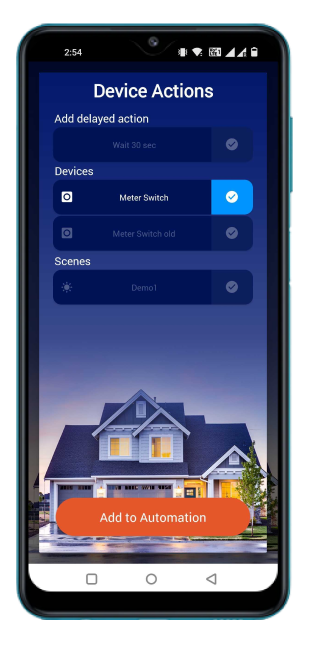
Step 9: Add More Actions
You can add the device in then condition under the add more actions.
(Note: Then - You can select the smart-home devices who performed after the device who triggered in IF condition (The device taken in Then condition is connected with the devices which taken in IF condition).i.e - Siren, Smart Meter Switch, RGB Bulb etc)

Under Device Actions, you can add delayed action to the devices.
Step 10: Set Device Status
Set the device's status and click on "Save Automation".
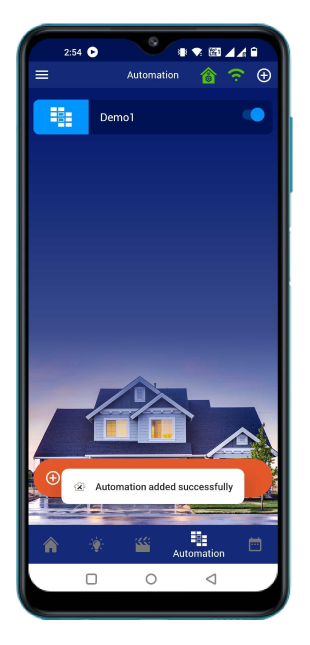
Step 11: Automation Created
Automation was added successfully.