-
keyboard_arrow_right keyboard_arrow_down
-
keyboard_arrow_right keyboard_arrow_down
-
keyboard_arrow_right keyboard_arrow_down
-
-
-
keyboard_arrow_right keyboard_arrow_down
-
keyboard_arrow_right keyboard_arrow_down
-
keyboard_arrow_right keyboard_arrow_down
-
keyboard_arrow_right keyboard_arrow_down
-
keyboard_arrow_right keyboard_arrow_down
-
keyboard_arrow_right keyboard_arrow_down
-
keyboard_arrow_right keyboard_arrow_down
-
keyboard_arrow_right keyboard_arrow_down
-
keyboard_arrow_right keyboard_arrow_down
-
keyboard_arrow_right keyboard_arrow_down
-
keyboard_arrow_right keyboard_arrow_down
-
keyboard_arrow_right keyboard_arrow_down
-
keyboard_arrow_right keyboard_arrow_down
-
keyboard_arrow_right keyboard_arrow_down
-
keyboard_arrow_right keyboard_arrow_down
-
keyboard_arrow_right keyboard_arrow_down
-
keyboard_arrow_right keyboard_arrow_down
-
keyboard_arrow_right keyboard_arrow_down
-
-
keyboard_arrow_right keyboard_arrow_down
-
keyboard_arrow_right keyboard_arrow_down
-
keyboard_arrow_right keyboard_arrow_down
-
keyboard_arrow_right keyboard_arrow_down
-
keyboard_arrow_right keyboard_arrow_down
-
keyboard_arrow_right keyboard_arrow_down
-
keyboard_arrow_right keyboard_arrow_down
-
keyboard_arrow_right keyboard_arrow_down
-
keyboard_arrow_right keyboard_arrow_down
-
-
-
keyboard_arrow_right keyboard_arrow_down
-
keyboard_arrow_right keyboard_arrow_down
-
keyboard_arrow_right keyboard_arrow_down
-
keyboard_arrow_right keyboard_arrow_down
-
-
-
keyboard_arrow_right keyboard_arrow_down
-
keyboard_arrow_right keyboard_arrow_down
-
keyboard_arrow_right keyboard_arrow_down
-
-
keyboard_arrow_right keyboard_arrow_down
-
keyboard_arrow_right keyboard_arrow_down
-
keyboard_arrow_right keyboard_arrow_down
-
keyboard_arrow_right keyboard_arrow_down
-
keyboard_arrow_right keyboard_arrow_down
-
-
keyboard_arrow_right keyboard_arrow_down
-
keyboard_arrow_right keyboard_arrow_down
-
keyboard_arrow_right keyboard_arrow_down
-
keyboard_arrow_right keyboard_arrow_down
-
keyboard_arrow_right keyboard_arrow_down
-
keyboard_arrow_right keyboard_arrow_down
-
keyboard_arrow_right keyboard_arrow_down
-
keyboard_arrow_right keyboard_arrow_down
-
keyboard_arrow_right keyboard_arrow_down
-
keyboard_arrow_right keyboard_arrow_down
-
keyboard_arrow_right keyboard_arrow_down
-
keyboard_arrow_right keyboard_arrow_down
-
keyboard_arrow_right keyboard_arrow_down
-
keyboard_arrow_right keyboard_arrow_down
-
-
-
keyboard_arrow_right keyboard_arrow_down
-
keyboard_arrow_right keyboard_arrow_down
-
keyboard_arrow_right keyboard_arrow_down
-
keyboard_arrow_right keyboard_arrow_down
-
keyboard_arrow_right keyboard_arrow_down
-
keyboard_arrow_right keyboard_arrow_down
-
keyboard_arrow_right keyboard_arrow_down
-
keyboard_arrow_right keyboard_arrow_down
-
-
keyboard_arrow_right keyboard_arrow_down
-
keyboard_arrow_right keyboard_arrow_down
-
keyboard_arrow_right keyboard_arrow_down
-
-
keyboard_arrow_right keyboard_arrow_down
-
keyboard_arrow_right keyboard_arrow_down
-
keyboard_arrow_right keyboard_arrow_down
-
-
keyboard_arrow_right keyboard_arrow_down
-
keyboard_arrow_right keyboard_arrow_down
-
keyboard_arrow_right keyboard_arrow_down
-
keyboard_arrow_right keyboard_arrow_down
-
keyboard_arrow_right keyboard_arrow_down
-
keyboard_arrow_right keyboard_arrow_down
-
keyboard_arrow_right keyboard_arrow_down
-
keyboard_arrow_right keyboard_arrow_down
-
keyboard_arrow_right keyboard_arrow_down
-
keyboard_arrow_right keyboard_arrow_down
-
keyboard_arrow_right keyboard_arrow_down
-
keyboard_arrow_right keyboard_arrow_down
-
keyboard_arrow_right keyboard_arrow_down
-
keyboard_arrow_right keyboard_arrow_down
-
-
keyboard_arrow_right keyboard_arrow_down
-
keyboard_arrow_right keyboard_arrow_down
-
keyboard_arrow_right keyboard_arrow_down
-
keyboard_arrow_right keyboard_arrow_down
-
keyboard_arrow_right keyboard_arrow_down
-
keyboard_arrow_right keyboard_arrow_down
-
keyboard_arrow_right keyboard_arrow_down
-
keyboard_arrow_right keyboard_arrow_down
-
keyboard_arrow_right keyboard_arrow_down
-
keyboard_arrow_right keyboard_arrow_down
-
keyboard_arrow_right keyboard_arrow_down
-
keyboard_arrow_right keyboard_arrow_down
-
keyboard_arrow_right keyboard_arrow_down
-
keyboard_arrow_right keyboard_arrow_down
-
keyboard_arrow_right keyboard_arrow_down
-
-
keyboard_arrow_right keyboard_arrow_down
-
keyboard_arrow_right keyboard_arrow_down
-
keyboard_arrow_right keyboard_arrow_down
-
keyboard_arrow_right keyboard_arrow_down
-
keyboard_arrow_right keyboard_arrow_down
-
keyboard_arrow_right keyboard_arrow_down
-
keyboard_arrow_right keyboard_arrow_down
-
keyboard_arrow_right keyboard_arrow_down
-
keyboard_arrow_right keyboard_arrow_down
-
keyboard_arrow_right keyboard_arrow_down
-
-
-
keyboard_arrow_right keyboard_arrow_down
-
keyboard_arrow_right keyboard_arrow_down
-
keyboard_arrow_right keyboard_arrow_down
-
keyboard_arrow_right keyboard_arrow_down
-
-
keyboard_arrow_right keyboard_arrow_down
-
-
keyboard_arrow_right keyboard_arrow_down
- Xunison
- Explore Our Products
- Platforms
- Android application
- Smart Home
- Camera Options
Camera Options
Note:
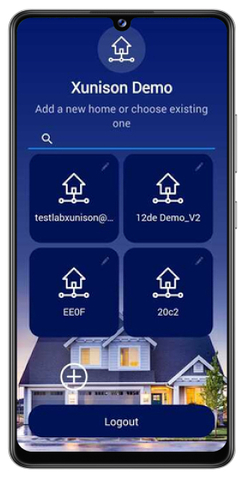
Log in to your Xunison Application and you will be directed to the home gateway.
Select the home gateway and proceed ahead.
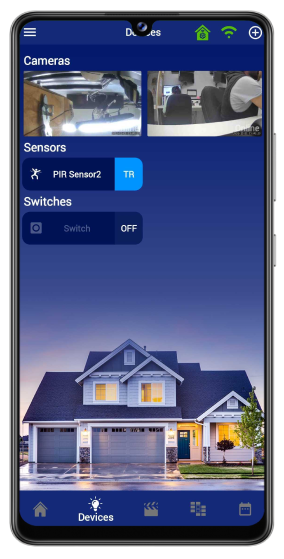
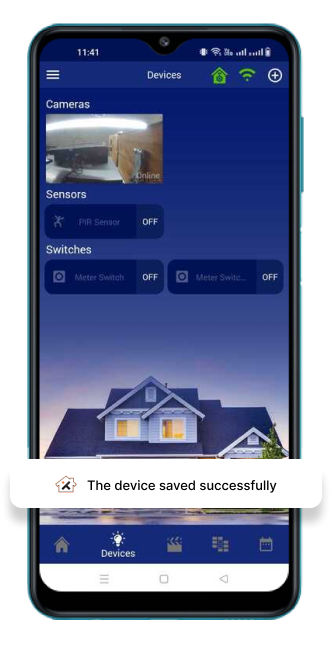
Step 1: Devices
After selecting the homegateway, you will be directed to the Devices section.
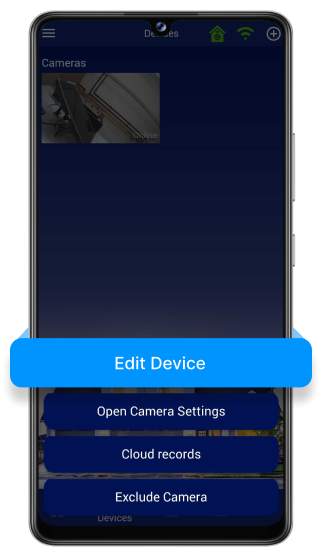
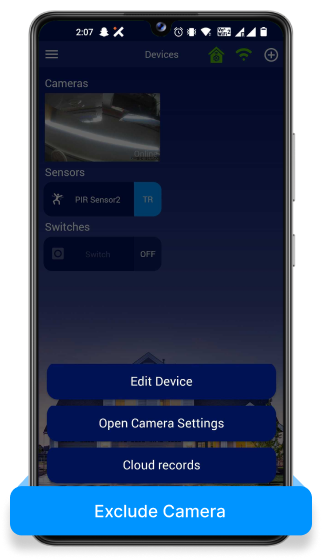
Step 2: Camera Options
Long press on the cameras, and you will get the camera options.
Here you can edit devices, open camera settings, cloud records, and exclude cameras.

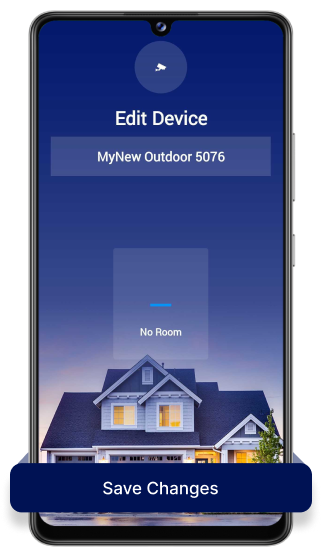
Step 2(a): Edit Device
The first option is Edit Device. From here, you can change the name and also add the camera to a room.
Assign the device to a particular room or edit the name of the device and click on Save Changes.
Changes have been updated and a message appears on the screen "The device saved successfully".
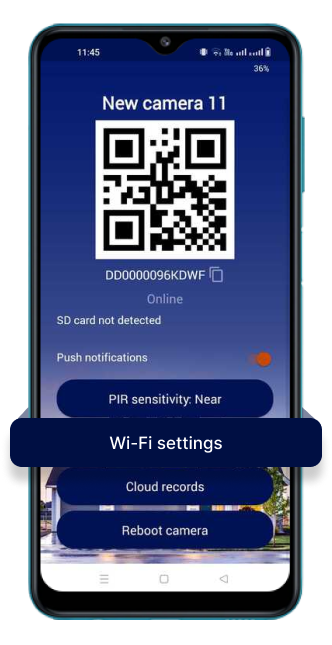
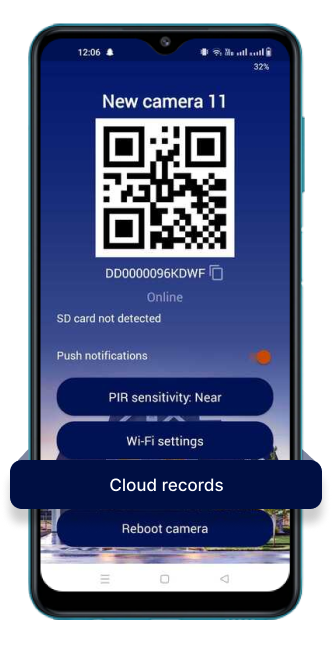
Step 2(b): Open Camera Settings
The second option is the Open Camera Settings. Select this option to change the camera settings.

Step 2(b)(I): Push Notifications
Here you can push notifications on your smartphone and also check whether the camera is online or not. You can enable or disable the notifications.
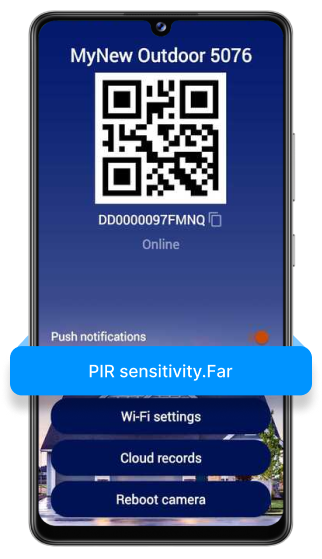
Step 2(b)(II): PIR Sensitivity
Here you can change the PIR sensitivity to Far, Medium, Near and Disabled.
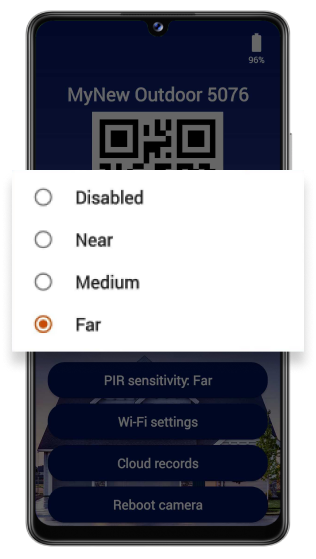
To proceed to the next option, select Wi-Fi settings.
Step 2(b)(III): Wi-Fi Settings
You have the option to change the Wi-Fi network of the connected camera.
(Note: Streaming of the camera might vary due to the Wi-Fi network).
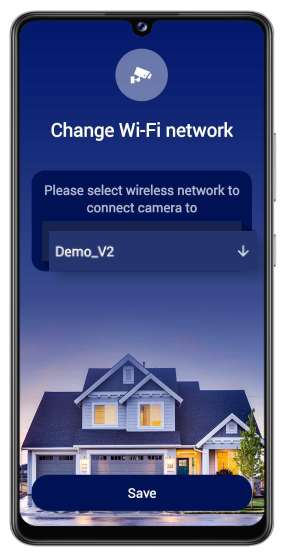
Select a particular wireless network from the list to connect the camera.

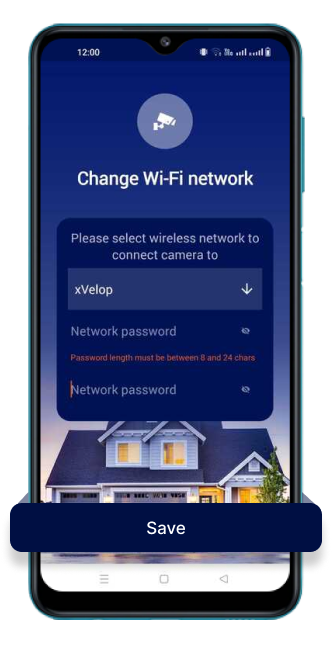
Change Wi-Fi Network
Select a particular Wi-Fi network and enter the network password. Confirm it and click on Save to proceed further.
Step 2(b)(IV): SD Card File List
When an SD card is inserted into the camera the below option is available in the app.
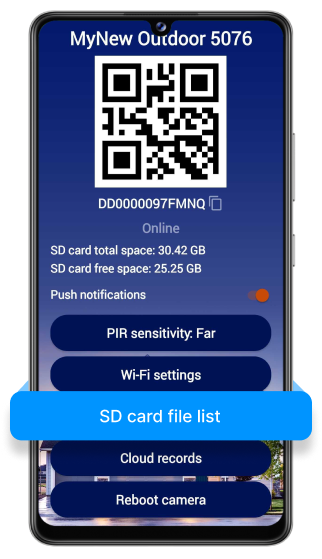
Click on the File List and you will be able to view the recordings.
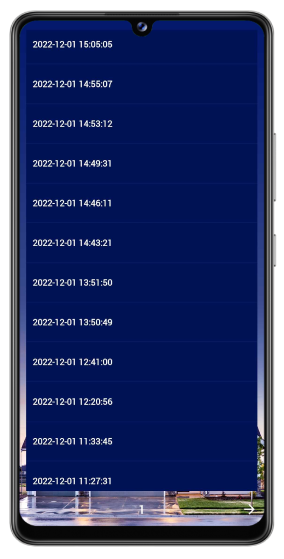
View the recording for a particular date
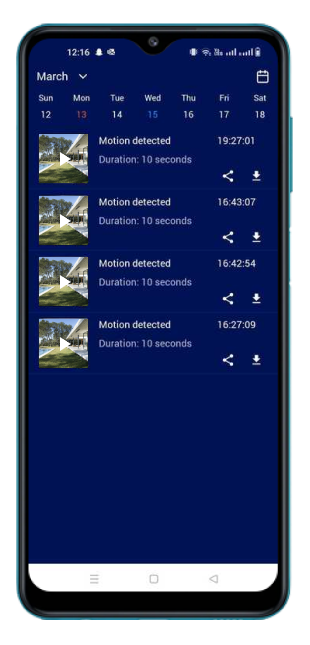
Select the option Cloud records.
Step 2(b)(V): Cloud Recording for PIR Sensitivity
The camera records all the PIR sensitivity recordings on the Cloud.

Cloud recordings
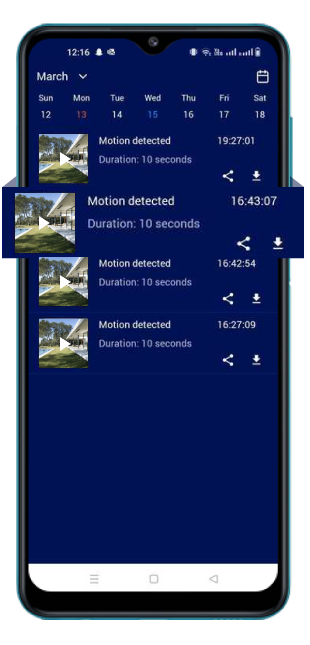
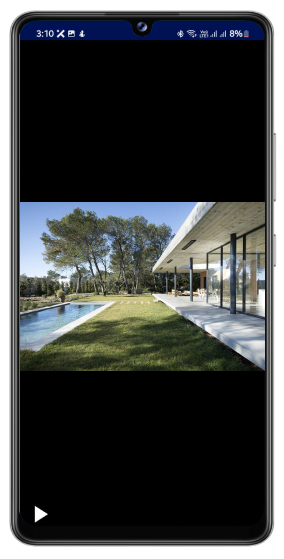
Click on a particular recording to view it.
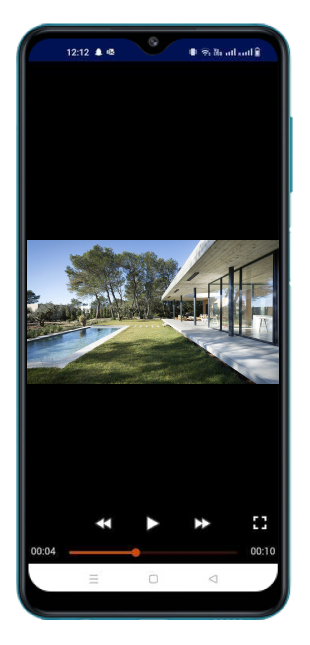
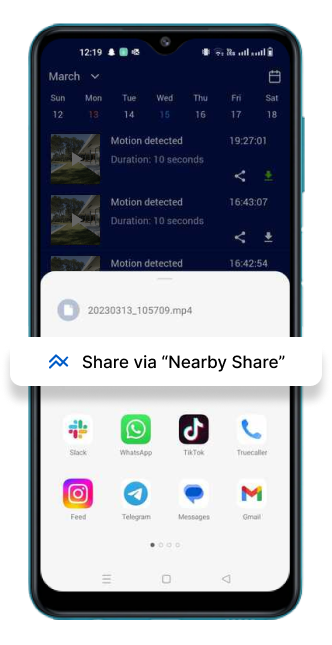
There is an option to download the recorded video or share the recording.
Click on the Share button to share the video recording.
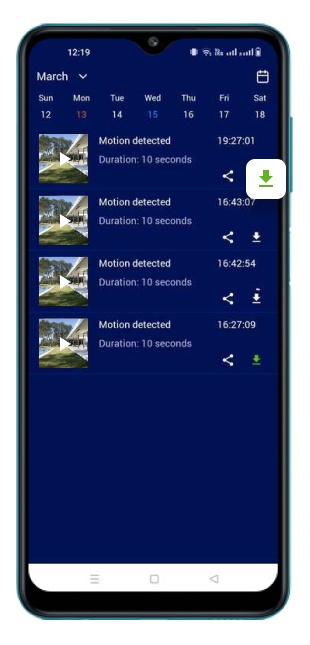
Click on the download button to start downloading the recorded video. The color of the download button turns green when the video is getting downloaded.
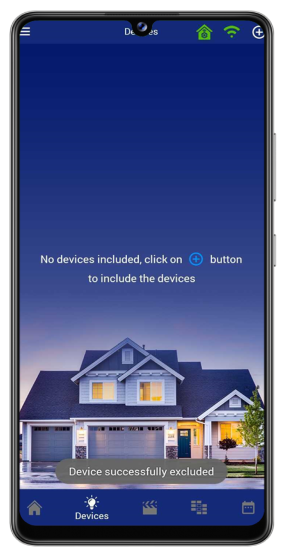
Step 3: Exclude Camera
The option to exclude the camera is available from Camera Options.
Select the option Exclude Camera and a message appears on the screen "Are you sure?" Select Yes or No.
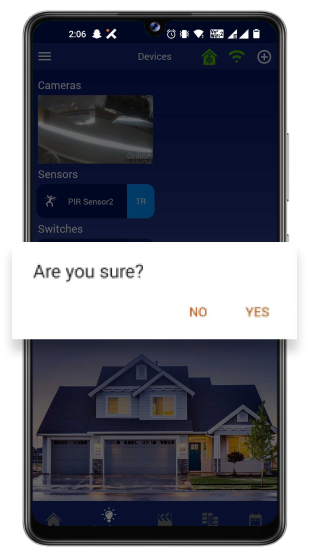
The device was excluded successfully.